By Mariax | Yes, it’s Crochet!
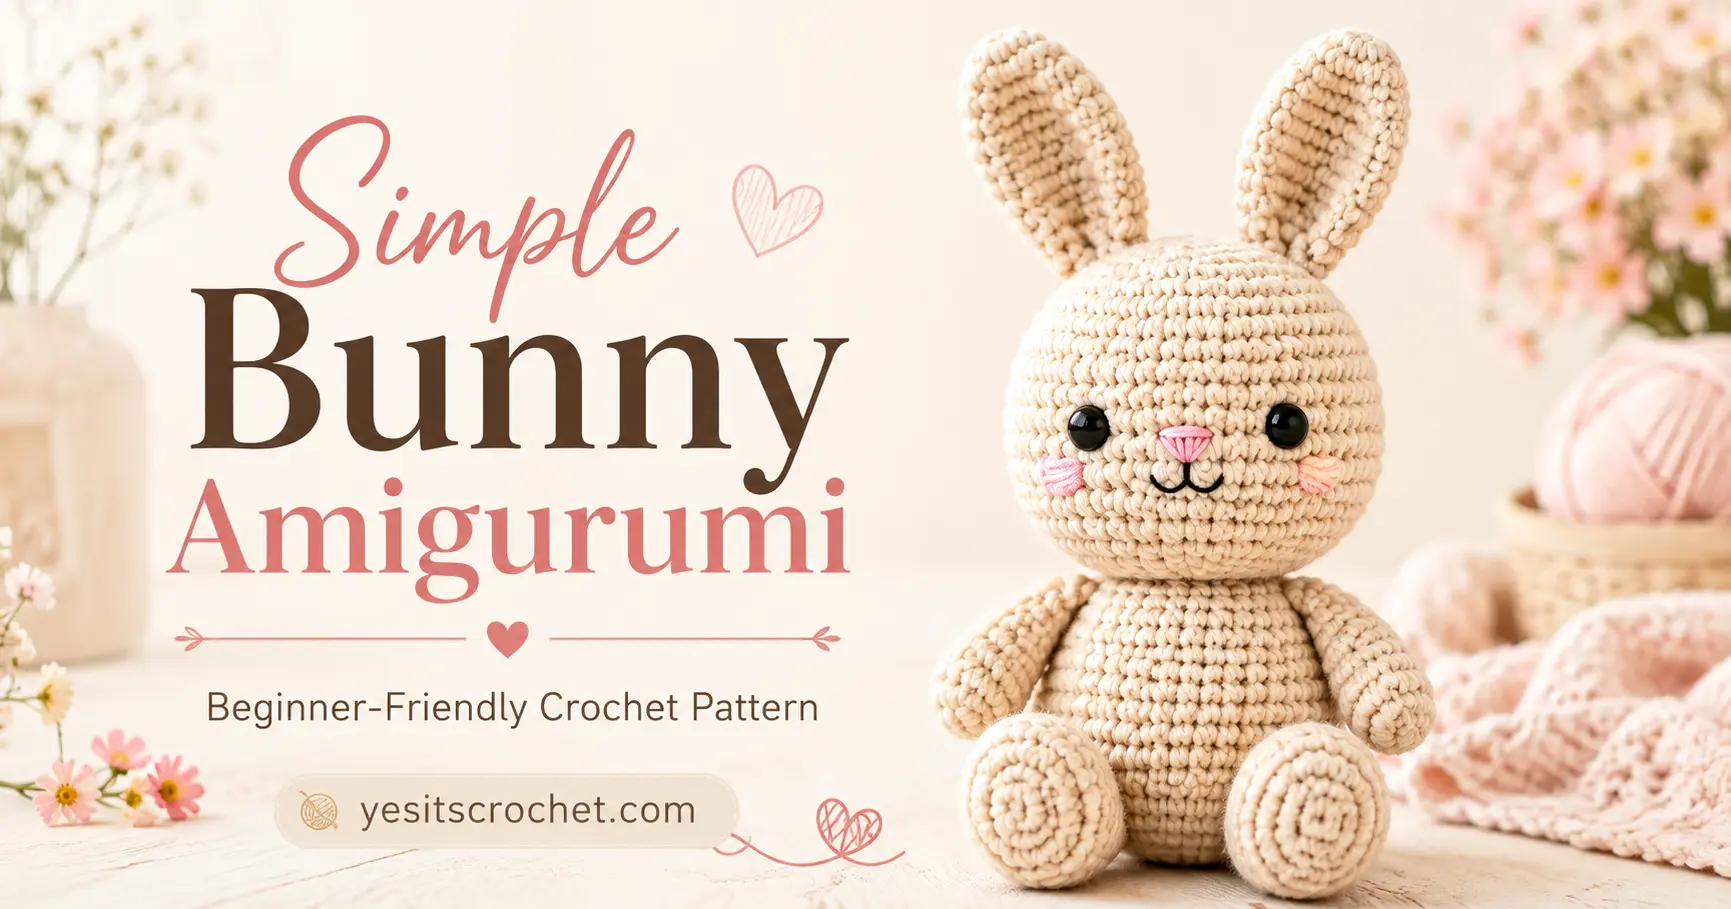
There is something especially sweet about watching a little bunny appear from nothing more than yarn, a crochet hook, and a few simple stitches.
This simple bunny amigurumi pattern is a lovely project if you are new to amigurumi or simply want a small, relaxing crochet project. We will make the bunny one piece at a time — head, body, ears, arms, and legs — and then sew everything together.
The finished bunny is approximately 12–15 cm (about 4.7–5.9 inches) tall, depending on your yarn, hook, and tension.
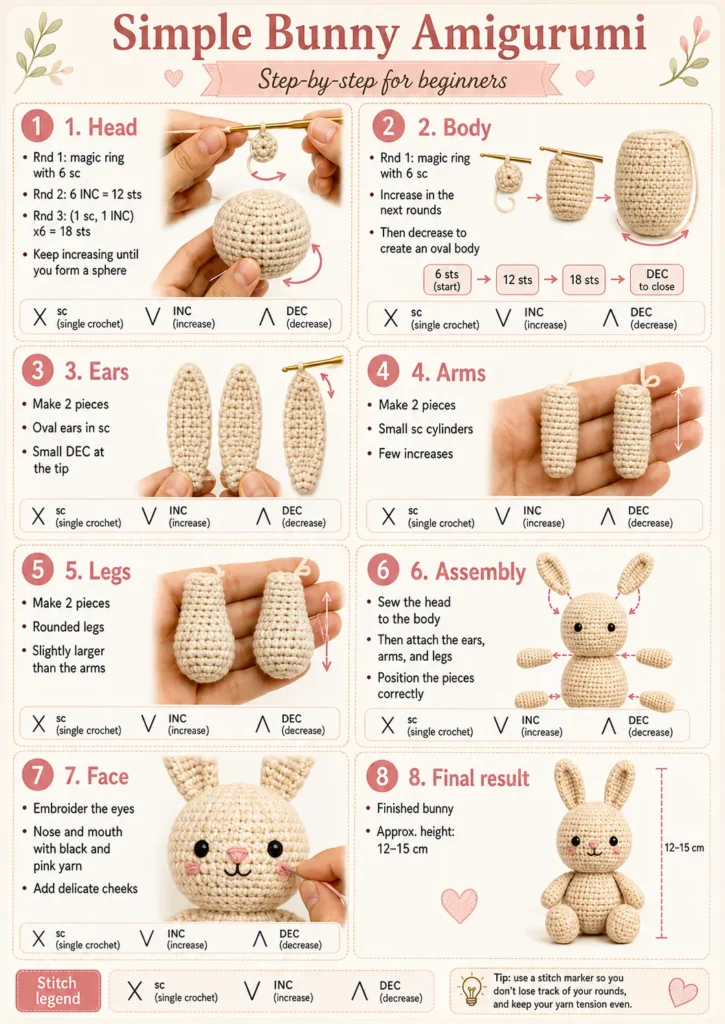
I’ll follow the same eight steps shown in the infographic, but I’ll explain each one a little more carefully so you can crochet along without feeling rushed.
Before We Begin
For this little bunny, you will need:
- Beige, cream, white, or another color of yarn for the bunny
- A crochet hook suitable for your yarn
- A small amount of black yarn for the eyes and mouth
- A little pink yarn for the nose and cheeks
- Fiberfill stuffing
- Yarn needle
- Scissors
- Stitch marker
For a small amigurumi like this one, I prefer using a hook slightly smaller than I would normally use for the yarn. This helps create tight stitches so the stuffing does not peek through.
Crochet Abbreviations Used
This pattern uses US crochet terminology:
- sc = single crochet
- INC = increase
- DEC = decrease
- sts = stitches
- Rnd = round
An increase means working two single crochet stitches into the same stitch.
A decrease means combining two stitches into one.
If you are just beginning with amigurumi, keep a stitch marker in the first stitch of every round. It is a tiny habit that can save you quite a bit of confusion later!
1. Crochet the Bunny Head
We begin with the bunny’s head.
Round 1
Make a magic ring and crochet:
6 sc into the magic ring — 6 sts
Pull the yarn tail gently to close the center.
Round 2
Work an increase into every stitch:
6 INC — 12 sts
You should now have a small flat circle.
Round 3
Repeat:
(1 sc, 1 INC) × 6 — 18 sts
The circle will become larger.
Continue Shaping the Head
From here, continue increasing gradually until the piece is wide enough to form the bunny’s head.
Then crochet several rounds without increasing so the sides begin to rise.
The goal is to create a soft, round sphere, just like the head shown in the infographic.
When the head has enough depth, begin decreasing gradually toward the bottom.
Before closing it completely, fill the head with fiberfill.
Add the stuffing little by little rather than pushing in one large piece. This makes it easier to keep the head smooth and round.
Mariax’s tip: I like a bunny head that feels firm but still soft when squeezed. Too little stuffing can make the head look wrinkled, while too much can stretch your stitches.
2. Crochet the Bunny Body
The body starts exactly the same way.
Round 1
Make a magic ring:
6 sc — 6 sts
Increase the Body
Continue increasing in the next rounds.
The basic progression shown in our guide begins:
6 sts → 12 sts → 18 sts
As the stitch count increases, the bottom of the body becomes wider.
Instead of making a perfect sphere like the head, continue crocheting so the piece develops into a slightly longer oval or egg shape.
Once you have reached the widest part of the body, crochet the middle section evenly.
Then begin using DEC stitches to narrow the opening.
Stuff the Body
Before the opening becomes too small, add fiberfill.
Pay special attention to the lower part of the body. A nicely stuffed base will help your bunny keep its shape when finished.
Continue decreasing until the opening can be closed.
You should now have:
- One round head
- One slightly longer oval body
Keep them nearby. We will join them in Step 6.
3. Crochet the Bunny Ears
Now we can make one of my favorite parts: those lovely long bunny ears.
You will need to crochet two matching pieces.
The ears are worked primarily in single crochet.
Begin with a small foundation and use increases where necessary to create the lower portion of the ear.
Continue working upward until the ear becomes a long, narrow oval.
Near the top, use a few decreases to create a gentle point.
Your finished ears should be:
- Long
- Narrow
- Slightly rounded
- Gently tapered at the top
Make the second ear using the same method.
Before fastening off, leave a long yarn tail on each ear. We will use those tails to sew the ears onto the head.
Do not worry if your two ears are not absolutely identical. Handmade toys have their own little personalities, and I think that is part of their charm.
4. Crochet the Bunny Arms
Next, make two arms.
The arms are much smaller than the body and should resemble little crochet cylinders.
Begin with a small round base and work primarily in single crochet.
Use only a few increases near the beginning so the arm remains narrow.
Then continue crocheting around without increasing to create the cylindrical shape.
You do not need the arms to be very long.
When you are happy with the size:
- Add a small amount of stuffing if desired
- Fasten off
- Leave a long tail for sewing
Repeat the same process for the second arm.
Try to keep both arms approximately the same length.
5. Crochet the Bunny Legs
Now make two legs.
The legs follow the same general idea as the arms, but they should be:
Rounder and slightly larger.
Begin with a small circular base.
Use increases to create a fuller lower portion. This gives the bunny those adorable rounded feet.
After reaching the desired width, continue working in single crochet to add height.
The finished legs should look a little more substantial than the arms.
Add stuffing if needed and leave a generous yarn tail for sewing.
Make the second leg to match.
At this point, you should have all of the bunny’s main pieces:
- 1 head
- 1 body
- 2 ears
- 2 arms
- 2 legs
Now comes the magical part — turning all those little crochet pieces into a bunny.
6. Assemble Your Amigurumi Bunny
Before sewing anything permanently, arrange all the pieces together.
This lets you check the proportions and positioning.
Attach the Head
Place the head directly above the body.
Using your yarn needle and the long yarn tail, sew the head securely to the body.
Work around the entire joining area.
Add extra stitches wherever necessary so the head does not wobble.
Attach the Ears
Position one ear on each side of the top of the head.
I recommend pinning or holding them temporarily before sewing.
Move them around until you like the expression they give your bunny.
Then sew both ears securely into place.
Attach the Arms
Position the arms on either side of the upper body.
Try to keep them at approximately the same height.
Sew around the top of each arm until secure.
Attach the Legs
Finally, position the legs near the bottom of the body.
For a sitting bunny, place them slightly toward the front.
Sew each leg firmly in place.
Take a moment to look at your bunny from the front, sides, and back.
Small adjustments now can make a surprisingly big difference to the finished toy.
7. Embroider the Bunny Face
Now our little bunny needs a personality.
This is the step that always makes an amigurumi suddenly feel alive.
Eyes
Using black yarn, embroider two small eyes on the front of the head.
Keep them evenly spaced.
If you prefer, you can also use safety eyes, but embroidered eyes are a lovely option when making a toy for a very young child.
Nose
Using pink yarn, embroider a small triangular nose between and slightly below the eyes.
A few simple stitches are enough.
Mouth
Use black yarn to embroider a short line beneath the nose.
Add two tiny curved stitches to create a gentle bunny smile.
Cheeks
With pink yarn, add a few delicate stitches on either side of the face.
Keep them subtle.
Those tiny pink cheeks give the bunny such a sweet expression.
Don’t rush the face. Move your stitches if necessary until everything looks balanced to you.
8. Enjoy Your Finished Bunny
And there it is — your simple bunny amigurumi!
Your finished bunny should measure approximately:
12–15 cm / 4.7–5.9 inches tall
The exact size will vary depending on:
- Yarn thickness
- Crochet hook size
- Crochet tension
- How firmly you stuff the pieces
Your bunny should now have:
- A soft round head
- An oval body
- Two long ears
- Two little arms
- Two rounded legs
- A sweet embroidered face
And although the basic construction is wonderfully simple, there are so many ways to make the next bunny completely different.
Try using:
- Soft gray yarn
- Pastel pink
- Light brown
- Cream
- Baby blue
- Lavender
You could also add a tiny bow, scarf, flower, miniature sweater, or another small accessory.
That is one of the things I adore most about crochet: once you understand the basic shape, a simple change of yarn or detail can create an entirely new little character.
A Few Tips Before You Start
If this is your first amigurumi, remember these little things:
Keep your stitches fairly tight so the stuffing stays hidden.
Use a stitch marker at the beginning of every round.
Stuff gradually rather than all at once.
Count your stitches regularly.
And most importantly, don’t worry about making every stitch absolutely perfect.
A handmade bunny is supposed to look handmade.
Sometimes the slightly crooked ear or the tiny difference between two feet is exactly what makes your finished amigurumi feel special.
Simple Bunny Amigurumi Pattern at a Glance
Here is the entire project again in the same order as our infographic:
- Head: Start with 6 sc in a magic ring, increase to 12 sts and then 18 sts, and continue shaping until you have a sphere.
- Body: Start with 6 sc, increase through the next rounds, then decrease to create an oval body.
- Ears: Crochet two long oval ears in single crochet and use small decreases near the tips.
- Arms: Make two small single crochet cylinders.
- Legs: Make two rounded pieces slightly larger than the arms.
- Assembly: Sew the head to the body, then attach the ears, arms, and legs.
- Face: Embroider the eyes, pink nose, mouth, and delicate cheeks.
- Final result: Shape and finish your approximately 12–15 cm bunny.
Ready to Crochet Your Bunny?
If you are learning amigurumi, this little bunny is a wonderful place to practice the three stitches you will use again and again in future projects:
single crochet, increases, and decreases.
Once those become comfortable, an entire world of tiny crocheted animals and characters opens up.
So choose a yarn you love, find a comfortable spot, and enjoy making your bunny one little stitch at a time.
Happy crocheting!
Mariax
Yes, it’s Crochet!